Author Archive for Elizabeth Farquhar

23
Jun
13

Snickerdoodles

For Alison and Desiree.

1 ½ cups sugar
1 cup softened butter
2 eggs
1 tsp vanilla
2 tsp cream of tartar
2 ¾ cups all-purpose flour
1 tsp baking soda
¼ tsp salt
2 tsp cinnamon

¼ cups cinnamon sugar

Preheat the oven to 400 degrees.
Cream together the butter and sugar, then beat in the eggs and vanilla.
Whisk together the cream of tartar, flour, baking soda and salt and cinnamon, and mix into the butter mixture. If you used a mixer for the butter, switch now to a wooden spoon.
Shape dough into teaspoon-size balls. Roll in cinnamon sugar.
Arrange 2 inches apart on an ungreased baking sheet.
Bake in the center of the oven for 8-10 minutes, or until the edges are golden.

21
Dec
12

Stollen

Stollen — Makes 3

Stollen 2012This is our Christmas tradition. Mom started it, with her sisters Betty and Lois. The kitchen was a mess of flour and powdered sugar on Christmas Eve, when Mom would be making stollen for the family and neighbors. I’ve continued the tradition, delivering them warm on Christmas morning to friends. Sister-in-law Jeri makes stollen too, and recently wonderful Nate requested the recipe! I’ve added Alton Brown’s cinnamon rolls to the Christmas morning spread, but stollen will always rule.

  • 2 c. buttermilk plus ½ tsp baking soda
  • ½ c. sugar
  • 1 tsp salt
  • 2 packages of yeast (or 1.5 T if you have it in a jar)
  • 2 or 3 eggs (I always use 3)
  • ½ c. butter
  • 7 c. or less flour
  • A stick of butter — softened
  • 1 pound fruitcake fruit* or mixed dried fruit
  • Red and green cherries and nuts to decorate
  1. Heat the buttermilk — it will separate. Not to boiling, just good and hot. Take it off the heat and let it cool until warm, then stir in the baking soda. It will fizz! Then add the butter so that it softens/melts
  2. In a big bowl, mix the sugar, salt and about a cup of the flour. In a separate bowl, beat the eggs, then add together with the milk mixture to the bowl. Beat the mixture until it’s smooth.
  3. Now add the flour about a cup at a time, beating well after each addition. Be patient — adding slowly and beating until smooth is part of what gives you tender bread.
  4. What is enough flour? Judgment call!  The dough will pull away from the sides of the bowl and form a ball. It will also absorb less and less flour, so as you’re getting near the end add the flour in smaller quantities — ¼ to ½ cup. STOP before it gets stiff. It should still be soft and still trying to be sticky. You will knead it twice, and each time the dough will take up flour, so don’t overdo it here.
  5. LOCATION determines how much — I use less flour here in AZ where it’s dry than I did in Massachusetts, or you will in Virginia, Kristin.
  6. First rise: Leave the dough in the bowl. Cover with a sheet of wax paper that you have buttered/oiled, greasy side down. Then cover with a damp towel and put it in a warm place. Let it rise until double — 1.5 hours? Depends on how warm your house is.
  7. Dump dough onto a floured surface and push it down to flatten. Dump your fruit onto the dough. *Mom always used fruitcake fruit — Betty too — but my family doesn’t like it so I do a mixture of dried cranberries, cherries, apricots, dates (chopped) … whatever. This time I plumped the fruit with a couple tablespoons of brandy — covered it and gave it about a minute in the microwave. I liked it — made the fruit softer in the finished product.
  8. Knead in the fruit until it’s distributed throughout the dough — a few minutes – 5? Wash out the bowl, oil/butter it and put the dough back in. Cover with the waxed paper and towel.
  9. Second rise: The fruit makes the dough heavier so it takes longer to rise. Usually I want this bread done in the morning, so sometimes I do this step in the fridge overnight. Whatever — let it double in bulk again.
  10. Again, dump it onto a floured board. Press it down some, then divide into 3 parts. Roll each part to form a1/2 inch thick oval or rectangle. Put 1/3 of the stick of butter on each, and spread it leaving a one-inch border. Then fold it so that it just overlaps in the middle and seal the edges — you will have to fold in the ends too and seal. Otherwise the butter escapes during baking. Put each on its own greased cookie sheet, sealed side down.
  11. Third Rise: cover (same shtick) and let rise for maybe an hour — don’t let it balloon up — then the bread will be dry. The length of time depends on whether you did the fridge overnight. You may do the overnight rise on this step instead of the last — if so let the dough warm up for about a half hour before baking. (the bowl takes up less room in the fridge)
  12. Baking: Mom’s recipe says 375 but that’s too hot for my oven — 350 is right for me. Brush loaves with melted butter before baking, It should take about 30 minutes — it should be golden on top, a bit browned on bottom, and sound hollow if you knock it with your knuckle.
  13. I’m not a bakery so I can only bake one at a time. Hold the other two in the fridge so they don’t get blown up and gassy … and they will! Especially if you do this all in one step with no refrigerator.
  14. Cool all the way. Ice with simple white icing: confectionary sugar, vanilla and heavy cream. Icing should look smooth, not wavy like buttercream.  Decorate with red cherries cut in half, green cherries sliced as leaves, and walnuts or pecans to make branches!
17
Jun
12

German potato salad

This is more a method than a recipe. Grandma didn’t give me exact quantities. What’s here is my best guess, so adjust it to your taste. For example, by now I have a feel for how much salt is needed, depending on volume. And I like things sharp. This is the difference between cooking and baking — baking is chemistry.

  1. Peel 6 potatoes and cut them into cubes — ¾ inch? Use your judgment. I think she sliced them sometimes … just not too thin. Half inch? And cut the spuds in halves or quarters first.
  2. Put them in a pan and cover with water. Add a bay leaf, salt and pepper and cook until tender. This is tricky — don’t overcook! You can save the cooking water for later if you remember to …
  3. Cut up some bacon in about 1 inch pieces. How much? I don’t know! Depends on how lavish you feel. Don’t honestly think you can do too much. Probably half a pound or a little less.
  4. Sautee the bacon until crisp and remove to paper towels with a slotted spoon.
  5. Cook about ¾ cup of onion in the bacon fat. You can quarter and slice it so you have strips of onion about 1-2 inches, or chop coarsely. Grandma always sliced her I think. Cook until they are soft and translucent — possibly golden but not browned.
  6. Remove the onion with a slotted spoon.
  7. Use the bacon fat to make a roux — you may have to pour some off — depends on your bacon. Judgment again. So add flour till the fat is taken up, stir until it’s done — you know how to do this! Add 3w/4 cup water and ½ cup vinegar to make the sauce. Season with salt, pepper and celery seed or celery salt. Adjust for sharpness (like when we make sloppy joes). Stir in the onions.
  8. Pour the sauce  over the potatoes. Add the bacon bits and some chopped parsley. Toss/mix gently (hope you didn’t cook the potatoes until mushy!).
  9. Serve warm.
30
May
12

Grandma’s Macaroni and Cheese

Cook till tender — not too soft:

Cheese Sauce:

  • 1 ½ cups elbow macaroni
  • 4 Tbs flour
  • 4 Tbs butter
  • 2 cups milk
  • Garlic powder
  • ½ or more tsp salt (taste it)
  • Pepper
  • ¼  tsp nutmeg
  • ½ tsp mustard
  • 1 tsp mustard (optional)
  • ½ tsp. Worcestershire sauce (optional)
  • ¾ pound cheddar cheese (shredded or sliced thin )
  • Make white sauce: melt butter. Add flour to bubbling butter and stir for a minutes or so – do not brown it. The result is roux, which is the basis of classic sauces. This process breaks down the gluten and liquefies it so your sauce is velvety and not flour-y. Add the milk in a stream as you stir constantly with a whisk. Keep stirring until it thickens. The result is the French utility player called Béchamel sauce – we call it  white sauce! So this classic children’s favorite turns out to have very sophisticated foundations…

    Then add the cheese and stir with a wooden spoon until it melts. Add salt, pepper, garlic, nutmeg and other flavors. Stir it up.

    Pour it over the drained macaroni (in its pot) then turn it into an 8X8 dish. Layer the top with slices of cheese and crushed ritz crackers. Drizzle with a little butter.

    Bake at 350 for about 30 minutes or so, or until the crust is toasty looking and irresistible.

13
May
12

Grandma’s Cheese Cake

Grandma always made this in a 9″ glass pie plate. I don’t know why she never bought a spring form pan … Anyway I always increase this by one half for my pan. You’ll have to experiment. A glass pie plate holds a little more than 4 cups of filling….Obviously you should make the crust first. While it’s baking you can sir up the filling.

Ingredients

  • 1 pound cream cheese
  • ½ tsp. vanilla
  • 1 Tbs flour
  • ¾ cup granulated sugar
  • 1/8 tsp cinnamon
  • 3 beaten eggs
  • ½ cup heavy cream

**Note: Stephen discovered that creaming the sugar and cream cheese, then blending in the eggs and heavy cream is better than beating the filling like you would cake. Stir, don’t whip. Handle it gently and the cheesecake won’t fall! Amazing. Results will be a nice flat top instead of a well …

Soften the cream cheese either by leaving it out, or gently warming it in the microwave on defrost.

In a bowl, combine the cream cheese and vanilla.

Beat in the sugar and cinnamon, then add the eggs one at a time.

Stir in heavy cream.

Pour into a baked crust. Grandma always did a shortbread crust. I like graham cracker better (1 1/2 cups ground up crackers, about 1/3 cup confectionary sugar, 6 Tbs melted butter, cinnamon. Bake at 350 for 10 minutes before filling). Here’s Grandma’s cookie crust recipe:

  • Combine ½ cup butter, 2 Tbs sugar and 1 cup flour — it will be pasty.
  • Press into the bottom of your pan — good idea to line the pan with parchment.
  • Bake at 375 for 12 -15 minutes

Bake at 325 for 35 minutes, or until a knife comes out slightly coated.

Spread the topping over top of the cheesecake after it’s been out of the oven for a couple minutes. Here’s what’s in the topping:

  • 1 cup sour cream
  • 3 Tbs sugar
  • 1 tsp vanilla


31
Jul
10

Grilled Pizza

My phone calls to  Mom would often start, “how do you make (fill in in the blank).” These were wonderful conversations. She would scramble around the little kitchen in Hamburg, N.Y. looking for the recipe I needed, then I would madly take notes on the backs of envelopes.

The other night I had one of those conversations, but the baton has been passed, and I am now the Mom. Stephen called from San Diego asking how to make gravy. What followed was (to me) a sweet 10 minutes spent describing what the flour would look like as it browned — how the transformation that occurs when the water or broth meets the golden paste of pan drippings and flour still seems like magic. We talked about roux — which is what the French call the substance that results from heating fat and adding flour. It’s a technique he could use to make dishes plain and fancy — from Edie’s macaroni and cheese to Bernaise sauce.

Good cooking is all about mastering technique. While we were on the phone, Stephen told me that he had figured out how to make grilled pizza — including the technique of flipping the raw dough onto the rack of a gas grill. The next day he sent me step-by-step instructions. I haven’t tried it yet — I think we’ll need to replace our crusty old grill first. But here is Stephen’s recipe, complete with tips on technique and a snap shot of one of his creations. I’m sharing it here to celebrate the next generation of family cooks. 

GRILLED PIZZA

Ingredients

Dough:

  • 2 cups warm water (Don’t use tap, good water tastes better)
  • 1 (1/4-ounce) packet active dry yeast (3/4 tablespoon)
  • 5 cups all-purpose flour
  • 1 tablespoon granulated sugar
  • 1 teaspoon kosher salt
  • 2 tablespoons olive oil, plus more for oiling the bowl and dough during cooking

Sauce:

  • 1 28 oz can San Marzano tomatoes (FROM ITALY – check the can), briefly run through a blender to smooth them out
  • 2 large garlic cloves, finely chopped
  • Olive oil
  • 1 teaspoon dried or 1 tablespoon fresh oregano
  • Salt to taste

Instructions

 Dough:

  1. Place water in a bowl, sprinkle yeast on top, and let rest until mixture is bubbling (about 10 minutes). Meanwhile, place flour, sugar, and salt in a large bowl and whisk to combine. Oil a second large bowl and set aside.
  2. When yeast mixture is ready, add flour mixture and olive oil and mix until dough is smooth and stretches 3 to 4 inches without breaking, about 6 to 10 minutes. Add a little more flour if the dough is overly sticky.
  3. Transfer dough to the oiled bowl and cover with a damp towel or plastic wrap. Set in a warm place until doubled in size, about 1 hour. (The dough can also be covered and placed in the refrigerator for up to 2 days.)
  4. Once dough has risen, punch down, cut into 6 pieces, shape, and grill as desired.

Sauce:

  1. Put enough olive oil in a medium sized pot to cover about ½ the bottom.
  2. Sautee garlic on medium heat until it begins to turn light golden brown.
  3. Add tomatoes and reduce heat to low.
  4. Simmer to reduce liquids, about an hour.
  5. Add oregano in last five minutes (especially if fresh, otherwise it turns black).
  6. If sauce is too bitter add just a little sugar. If you cook it for the full hour this won’t be necessary.

Grilling:

  1. Preheat grill, brushing the grate so it is clean. Turn one side to low and leave the other side on high.
  2. Stretch dough into a very thin (nearly ripping in the middle) oval about 12 inches across.
  3. Brush olive oil on one side of the dough. Grip it on the wide side of the oval and quickly flip it onto the hot side of the grill. Be careful not to rip or fold it (this may take a little practice). Close the lid.
  4. When the dough begins to bubble and the underside develops a crust (only takes a minute or two, watch it closely!) brush more olive oil on the raw side and flip it onto the low side of the grill.
  5. Now you can top the pizza with whatever you like. When you’re ready, close the lid again and let the bottom cook. This will take significantly longer than the first side but it still happens quickly!
  6. Remove, cut and enjoy.
31
May
10

Scones Part II

At eldest on Stephen’s apartment … there was no oatmeal in the cupboard, so I searched for a recipe that called for just flour. I found this one, for blueberry scones. I was doubtful about the eggs, and I had to use frozen berries. They turned out well, but the eggs make them resemble muffins. Picture to follow!

22
May
10

Scones and homemade play dough

Mom started making the oatmeal scones from "The Book of Bread" (Judith and Evan Jones; Harper & Rowe, Publishers, 1982) after I had left the house, and I started making them when the kids were little. When playgroup in Scituate, MA was at our house I would make the scones and a batch of  homemade play dough. As the moms and kids would arrive, the snowsuits, mittens and boots would pile up by the side door. For cold little hands I had warm play dough ready, and for the Moms -- hot coffee and fresh scones.

We live in Phoenix now, and I make these for a fast but special breakfast, or to take to work as a treat. I can be standing in the kitchen thinking, “maybe I should make some scones…” and about 30 minutes later I can be showered and the scones will be done. 

My copy of the “Book of Bread” has Mom’s adjustments in the margin, and I’ve made my own changes over the years. Here’s the evolved version. When I find the play dough recipe (which was taped inside a cabinet door in Scituate) I’ll add it here.

1 1/4 cups white flour
1 teaspoon baking powder
¼ teaspoon baking soda
½ teaspoon coarse salt or ¼ teaspoon table salt
¼ cup sugar
1 stick butter, cut into ½ tablespoon chunks
1 cup oats (I like quick oats for this)
1/3 cup currants, dried cranberries, mini chocolate chips or nuts
*1/4 to 1/3 cup finely ground nuts — “wicked good”
½ cup buttermilk
Melted butter and sugar crystals

Combine the flour, baking powder and soda, salt and sugar in a food processor. (*If you want to add the ground nuts, grind them to a pretty fine crumb in the processor before you add the other dry ingredients.) Cut in the butter with a few pulses. The butter should be in pea-size bits now — do not over-process!
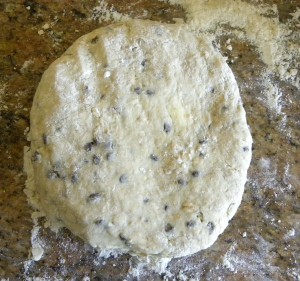
Scones before baking

Shape into 7" round

Dump the mixture into a bowl and toss in the oatmeal and your choice of fruit, nuts or chocolate (or leave them plain …). Add the buttermilk and stir it in with great restraint. You want the dry ingredients to just barely stick together. Overwork it and you’ll have a paving stone (quoting Mom here) and not a scone. Move the dough onto a floured surface and knead it lightly (remember Mom’s warning …) about 7 turns. Make it into a 7 inch wide disk, then cut into 8 wedges.

Separate the scones on an ungreased cookie sheet. Brush with butter and sprinkle on sugar (way optional!). Put in a preheated 375 degree oven. 

Now get in the shower, but be sure you return to the kitchen in 15 minutes to remove the scones from the oven and onto a cooling rack. These are best when straight out of the oven, but if you have one leftover you can zap it in the microwave.

22
May
10

Deliciously Interesting

Every family has its own dialect. When my husband was growing up in Dorchester, Massachusetts, “ten birds” was his family’s  way of ramping something up, such as “It’s cold as ten birds out there,” or “I’m as hungry as ten birds.” In Boston, “wicked” serves the same purpose: “wicked good.” I don’t think the Farquhars know why “ten birds” meant “very” to them. Maybe the birds in Dorchester flew in gangs — get ten of them together and they make a lot of noise. Who knows? But the silly phrase makes us smile.  

Another of our expressions is “tasty papers.” Tasty papers are something deliciously interesting … like a really great hand in a game of scat, or secret information about someone’s birthday: “Mmmm….tasty papers!”  

Edie Oberg in 1951

I started to think about a food blog when I was going through some boxes left over from cleaning out my Mom’s apartment. Edith Haskell Oberg, who passed away eight years ago today, was a wonderful home cook. She had her tried-and-true family favorites, but she was adventurous to the end. Her stuff was full of recipes clipped from newspapers and magazines, and squares of scratch paper upon which she had copied a friend’s recipe in her beautiful Palmer Method hand-writing. I also found old cookbooks and pamphlets — like Pillsbury Bake Off booklets from the early ’50s. Her “Betty Crocker Cook Book” — a gift from her mother in the 1940’s — and a yellowed copy of “Good Maine Food” — the source of the potato soup she made for us to eat on Halloween before we went trick-or-treating — were never lost. They are precious to me and I had them stored separately.  

So, as the recipes and photos piled up on the bed in my guestroom, I realized that I had some tasty papers on my hands. And I thought, what a great name for a blog!  

For eight years I have intended to scan the best of Mom’s recipes and compile a book for my children and Edie’s other grandchildren and their wives. I never even started, but I think a blog is a better idea. This way I can share her good recipes as time allows. Maybe I’ll even scan a few so you can see that graceful writing.  

I can share some family stories here, too. And because I felt so close to Mom and Aunt Betty — even the female relatives who had passed before my birth — this blog will be about being a woman, a wife and a Mom, in this crazy world. The kitchen, cooking, and our recipes tie us women together across the generations. The food is always full of love, as Mom used to say, and I feel their love every time I make one of their dishes. I hope some of you might contribute, too, because I know this family has great cooks on all sides: Farquhars, Obergs, Haskells, Lanes ….  

Hopefully “Tasty Papers” will be as interesting as ten birds.


April 2024
M T W T F S S
1234567
891011121314
15161718192021
22232425262728
2930